In the previous episode of The Phoenix Project, we examined a few issues with mounting a front fender. Today, we will turn our attention to the rear fender in the hope that some readers may gain some inspiration.
The 1985 Trek 620 and Trek 720 are renowned for their long 47mmm chainstays. On the 620 this poses a problem for mounting the fender chainstay bridge attachment point. Trek decided to economize a bit and integrate the chainstay bridge into the bottom bracket casting:

The 1985 Trek 720 doesn't pose this problem as it has a traditional brazed on chainstay bridge much further aft of the bottom bracket. Here is another view of the Trek 620's configuration:

That is a whole lot of space to bridge with a fender mount. Over the 10 years I owned my previous 1985 Trek 620, I tried several solutions. All were increasingly better than their predecessors, but none had ever proven entirely satisfactory in a combination of durability, adjustability, and stability.
When I purchased this 1985 Trek 620, I vowed to do better.
Over the past several weeks as The Phoenix Project has proceeded, this fender mount issue has been bubbling around in the back of my mind, keeping me awake at night on the lookout for the odd scraps that may be useful.
I had been keeping my eye on these mounting struts on a beat up old rack that has thus far escaped the trash man. This rack has led a hard life, as evidenced by the bent strut:

Initially, I rejected these as any sort of raw material because they were chromed steel. DIY mounts entail cutting, bending, drilling, etc., which would expose the rust prone steel substrate. However, not finding anything else promising around the shop, I returned to these and discovered, to my great joy, that they were stainless steel.

Complicating matters somewhat for this metalworking exercise is that I've sold of many, if not most, of my bigger, heavier, more expensive and sophisticated tools as my family has relocated to Japan and I'm just here part-time in the U.S.
However, this does work to the readers benefit. Too often in tech "how-to's", at a particularly critical juncture, the author pulls out a laser guided, ruby clad pneumatic torque wrench, the cost of which would pay the mortgage for several months, and saves the day but leaving the reader feeling hopeless if not a bit cheated.
There won't be any such trickery today on Fuji Otaku, as the most sophisticated tool we will resort to will be a common hand held power drill.
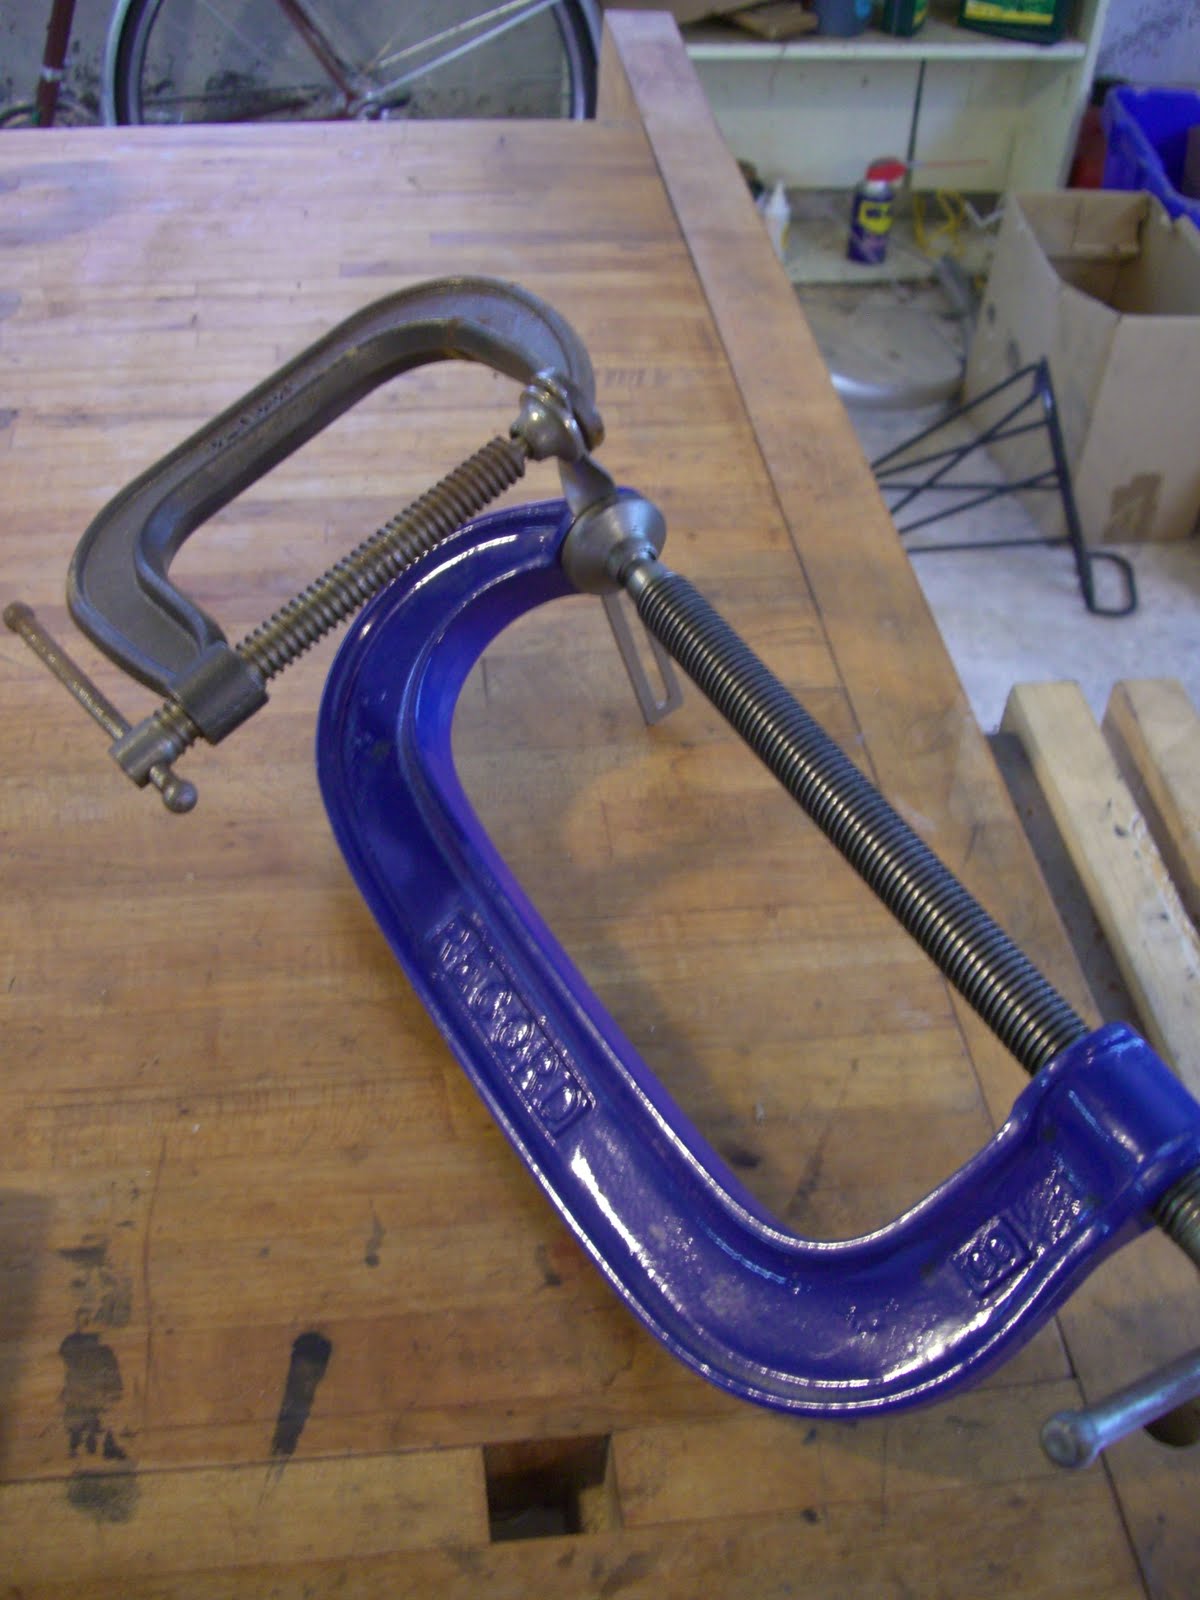
To the task we turn our attention to the undamaged strut. It has a 90 degree spiral bent into it. After determining that this feature could not be used to any advantage in the current situation, we straighten the spiral. First we clamp 2 C clamps as close to the spiral as possible:
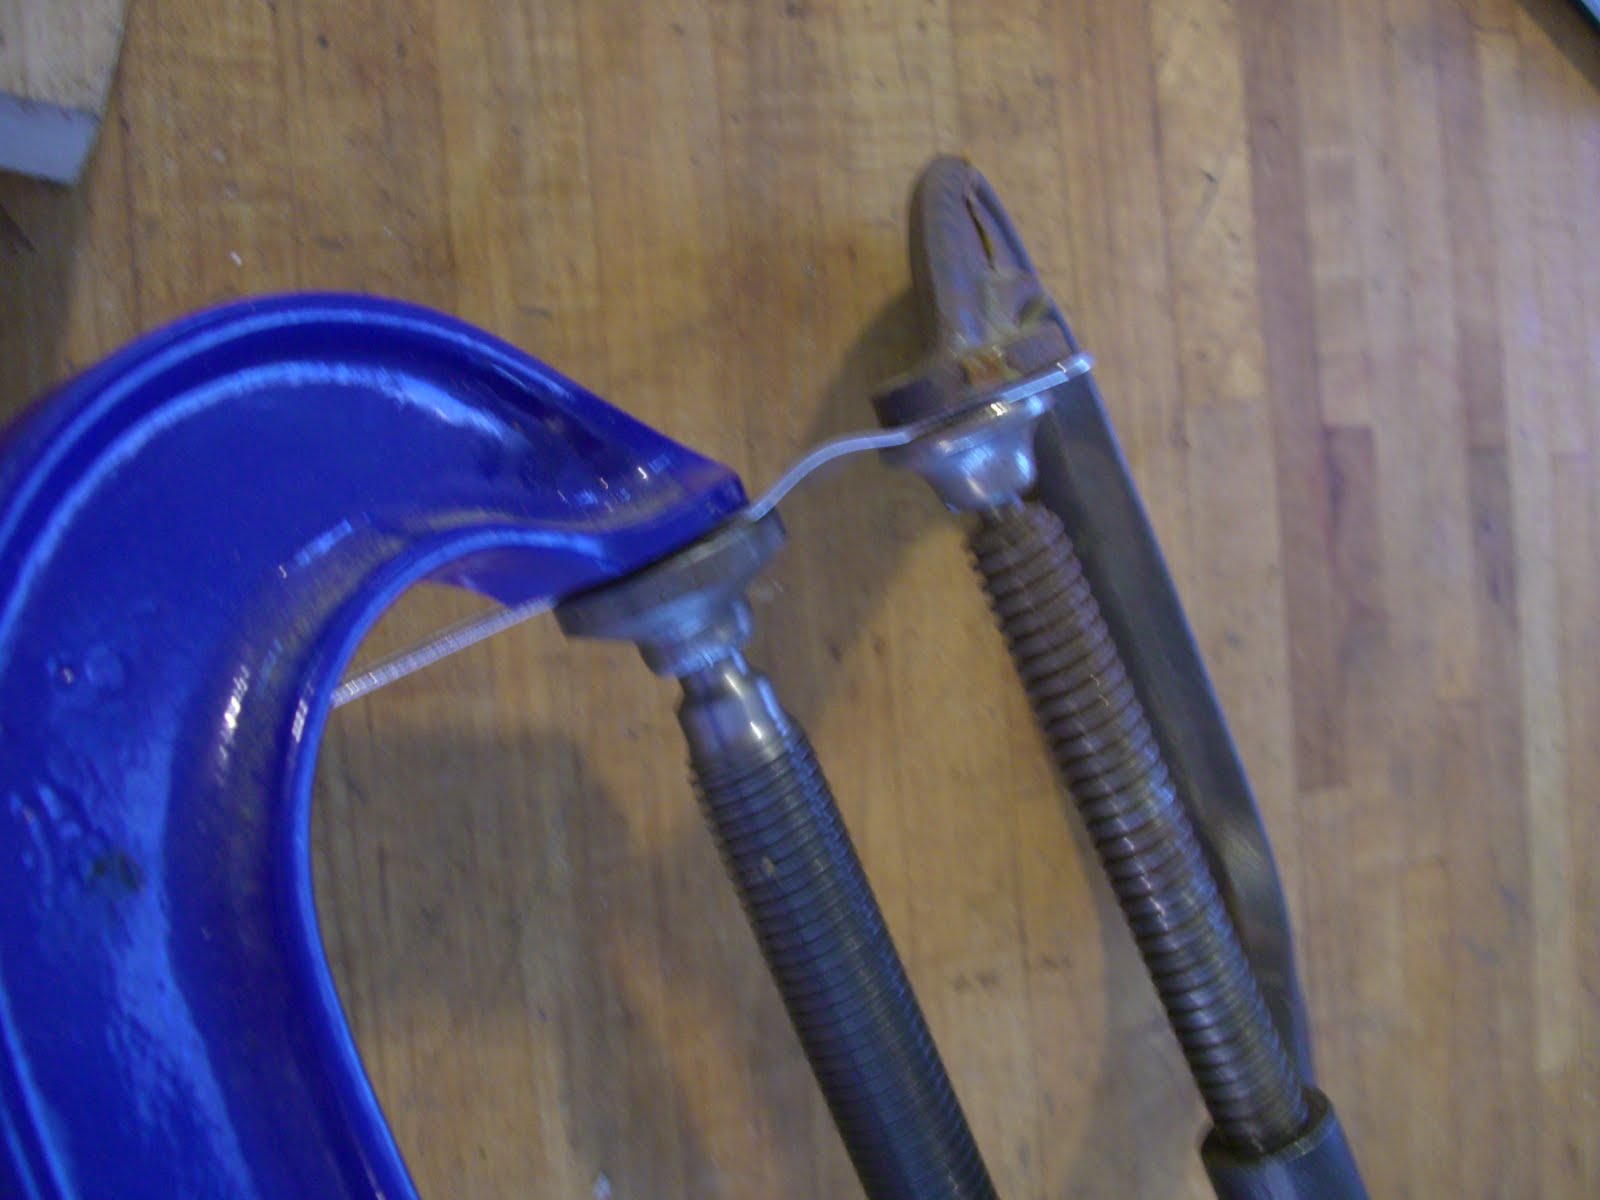
We grab each C clamp and roughly twist out the spiral. This does leave some bow in the strut:
Using the bigger clamp, we flatten this further by adjusting the clamp position and clamping down very tight.

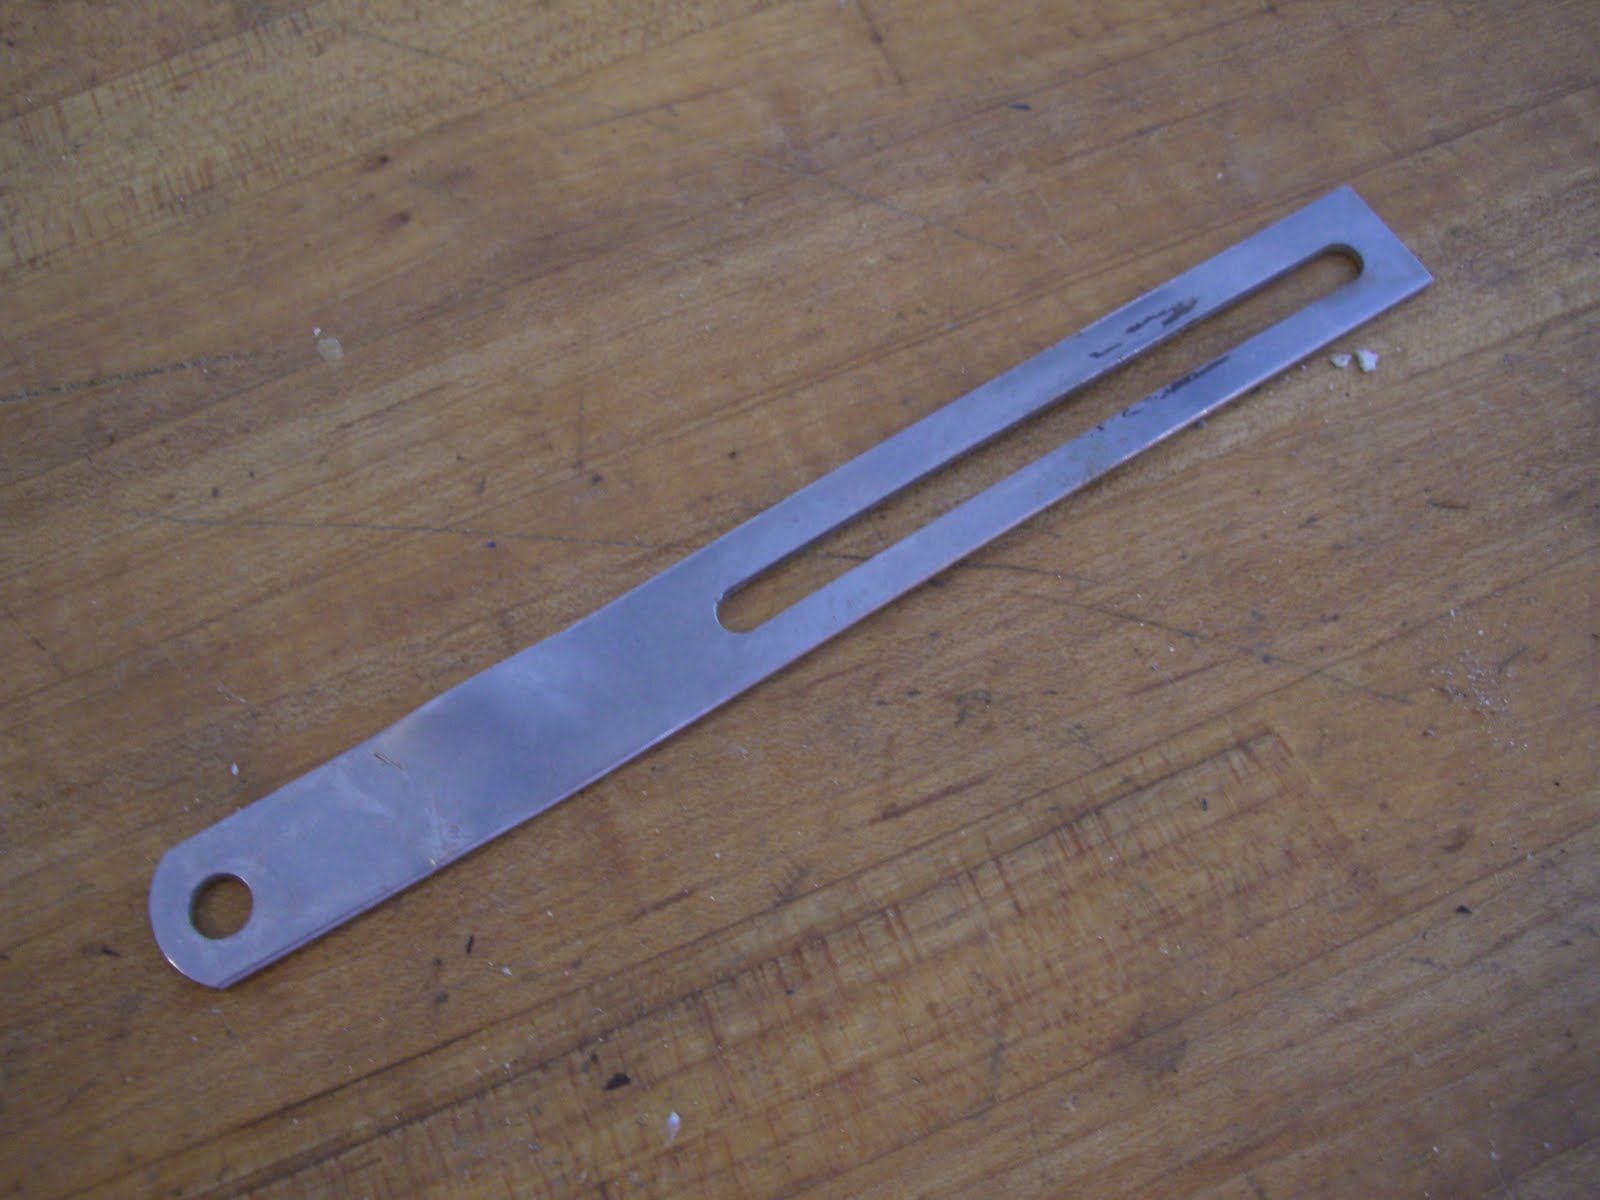
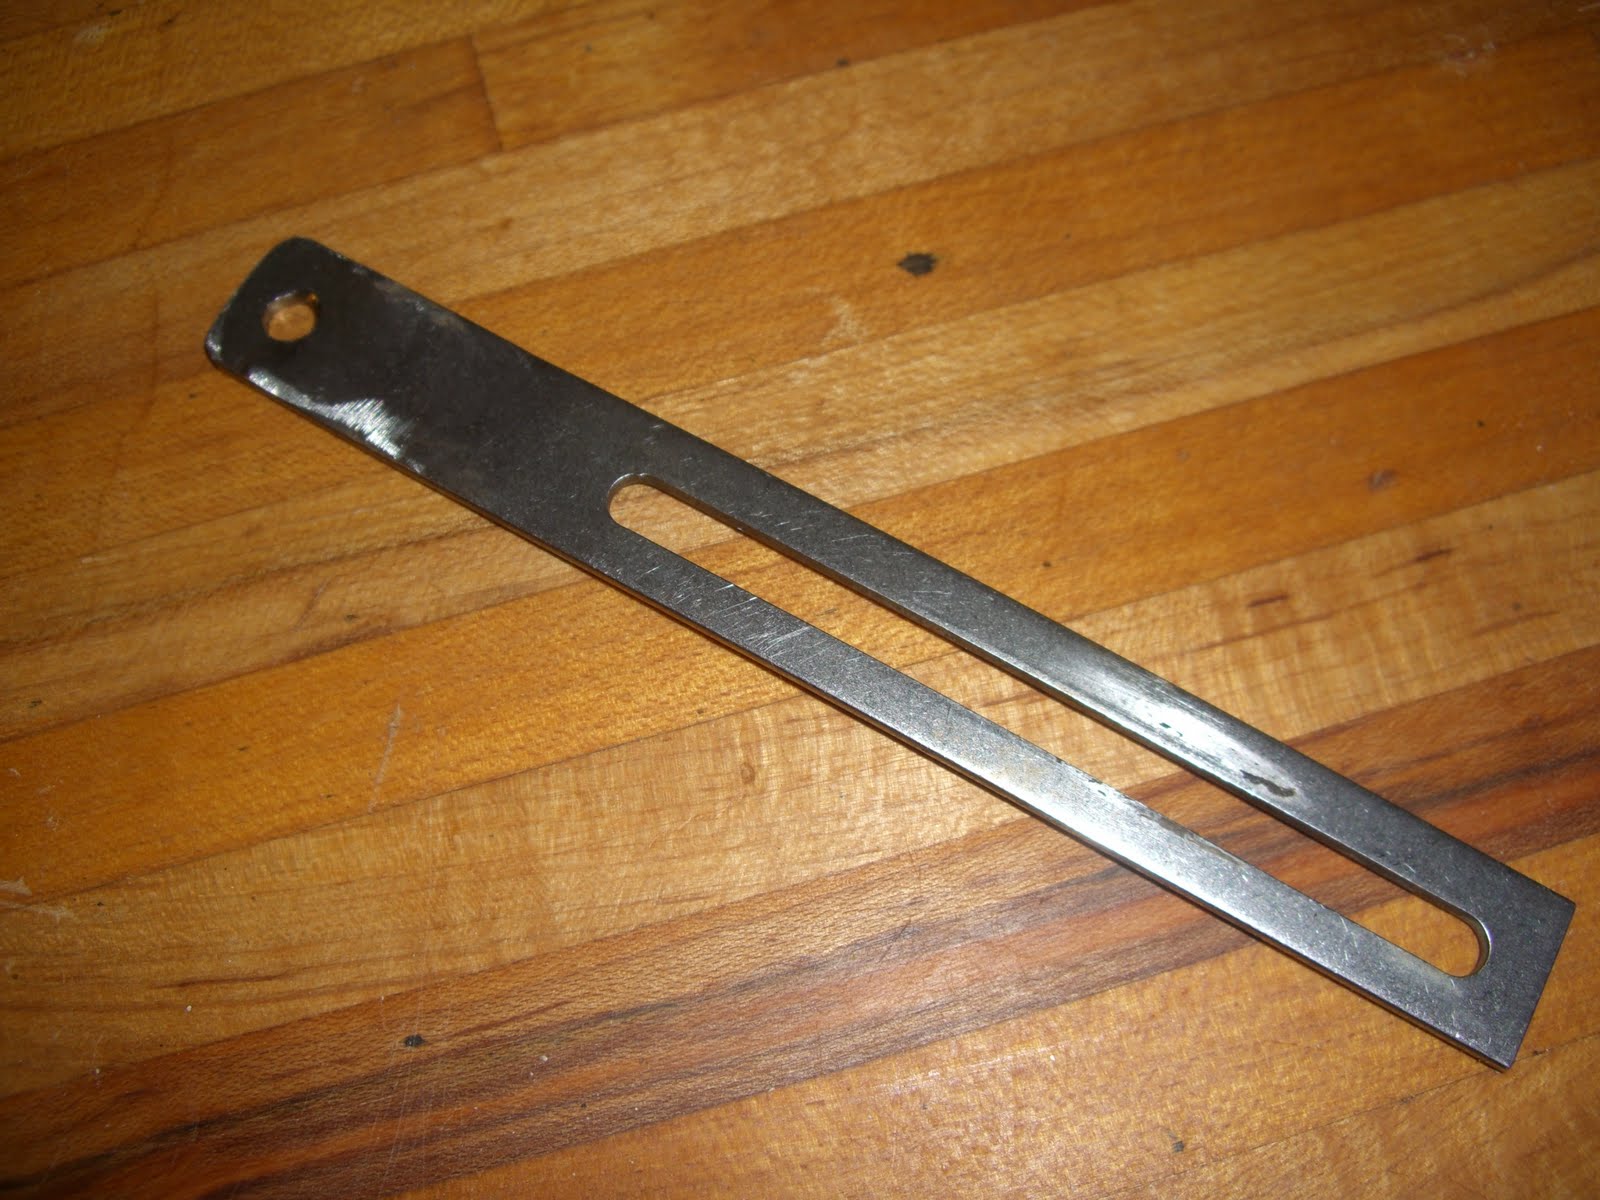
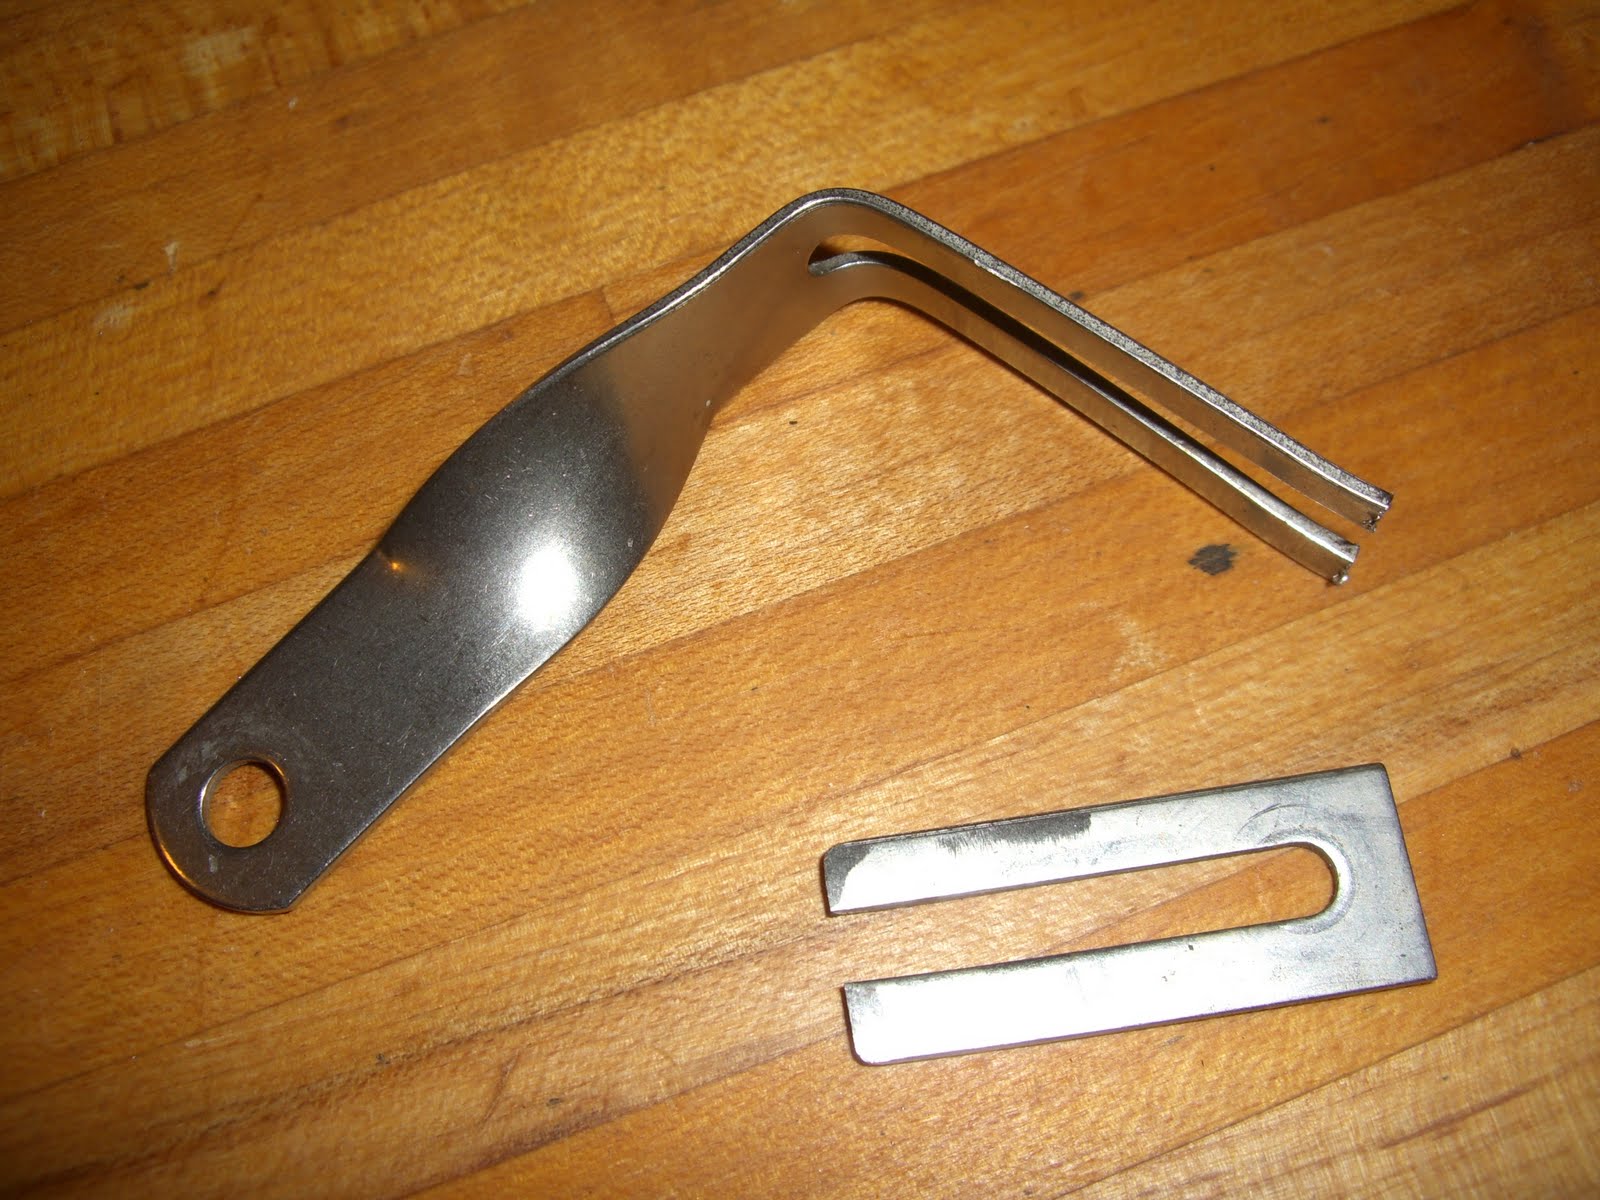
Following this, we tune it a little further with a few whacks of a hammer on a flat wood surface and end up with a pretty decent piece of flat stock:
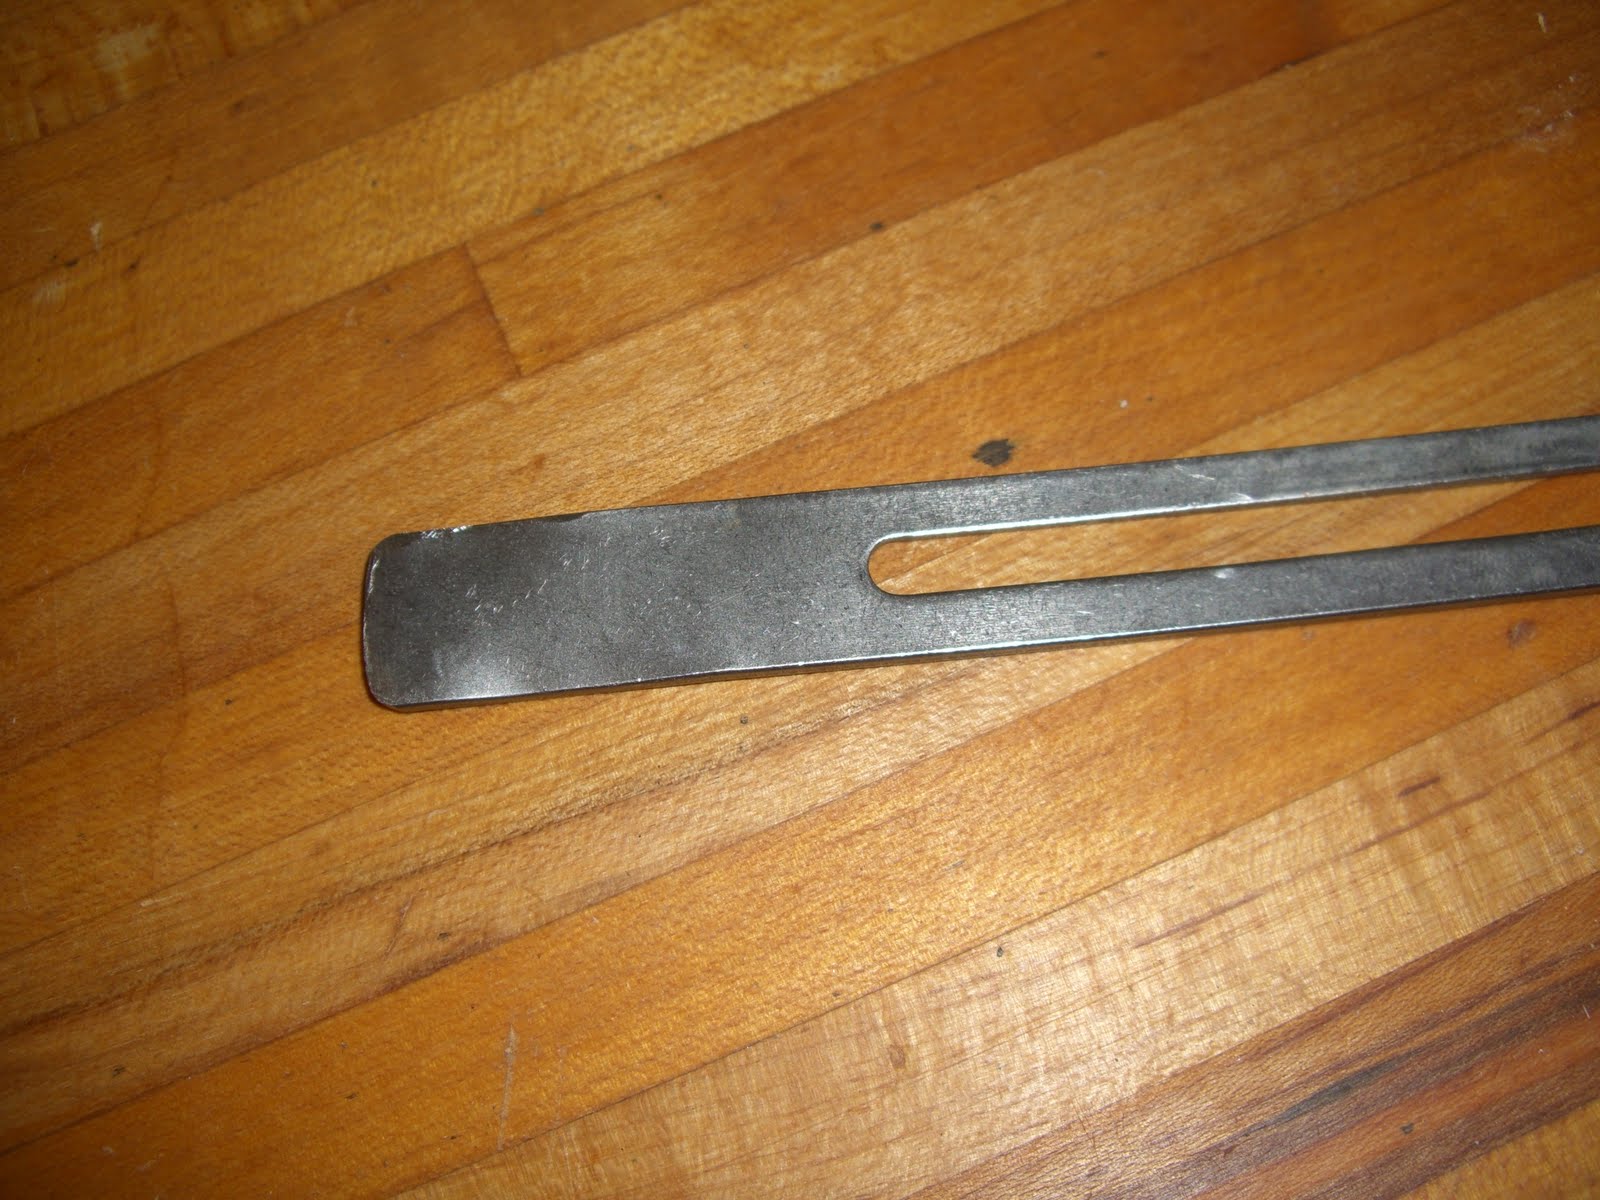
The hole on the strut is sized for an M6 bolt and is consequently useless to us for a clean fit because the hole on the Trek 620's chainstay bridge is for a smaller M5 bolt.
So we grab a hacksaw and cut it off.

Please note that hacking through steel can generate significant heat, don't just grab the pieces right away.
Another thing to note is that bicycle parts never come with sharp edges so you don't gouge yourself while attempting a field repair in the driving rain on a muddy path thirty miles from home. So your bicycle parts shouldn't come with sharp edges either.
Following this dictum, we grab a file, remove burrs, sharp edges, and so forth until the hacksaw cut edge is so smooth and rounded one could leave it in the crib with the baby without any worry:
I'm not going to mention it again, but do this after each operation that leaves sharp edges and do it right away so it isn't forgotten.
Now we need a properly sized hole for a M5 bolt. With a (cheap) metal punch and a hammer we create a divot to start the drilling since we will be using a hand held drill. Otherwise the bit will skitter around all over the place. I just eyeballed this:

This is then C clamped to a flat wood scrap for drilling. C clamps are cheap and useful, as we are finding out.
Now keep in mind we are drilling steel. Steel is much, much tougher than aluminum - this works to our advantage on our old steel steeds but is a major pain for drilling at home. You need a sharp bit, some oil, and patience.
First, squirt a little oil on the area to be drilled. Then, get the point of the bit on the pilot divot created earlier with the punch. You should be able to feel it click into the hole through the drill. If you can't, enlarge the divot by whacking it again a few times with the punch and hammer combo.
Start drilling cautiously with firm pressure. In the USMC, they used to teach us not to go "full auto" with our M16's but rather do "three round bursts" (later models of M16's now have this feature built in).
Anyhow, don't go full auto, especially right off the bat when the hole is not formed. Again, if it skitters on your first tentative bursts, get out the hammer and punch again.
Now that the hole is formed, your bursts can become longer. The temptation is to just lay into now and finish the dang hole, but don't do that. First, the steel will become hot, so hot the wood block will start smoking. Second, you need to stop and add oil periodically to the whole.
This really isn't as much trouble as it sounds. Do a few heavily weighted bursts with the drill, ooze a little more oil onto the hole, slow down a little if things are getting too hot, rinse, repeat. It will all be over in a couple of minutes.
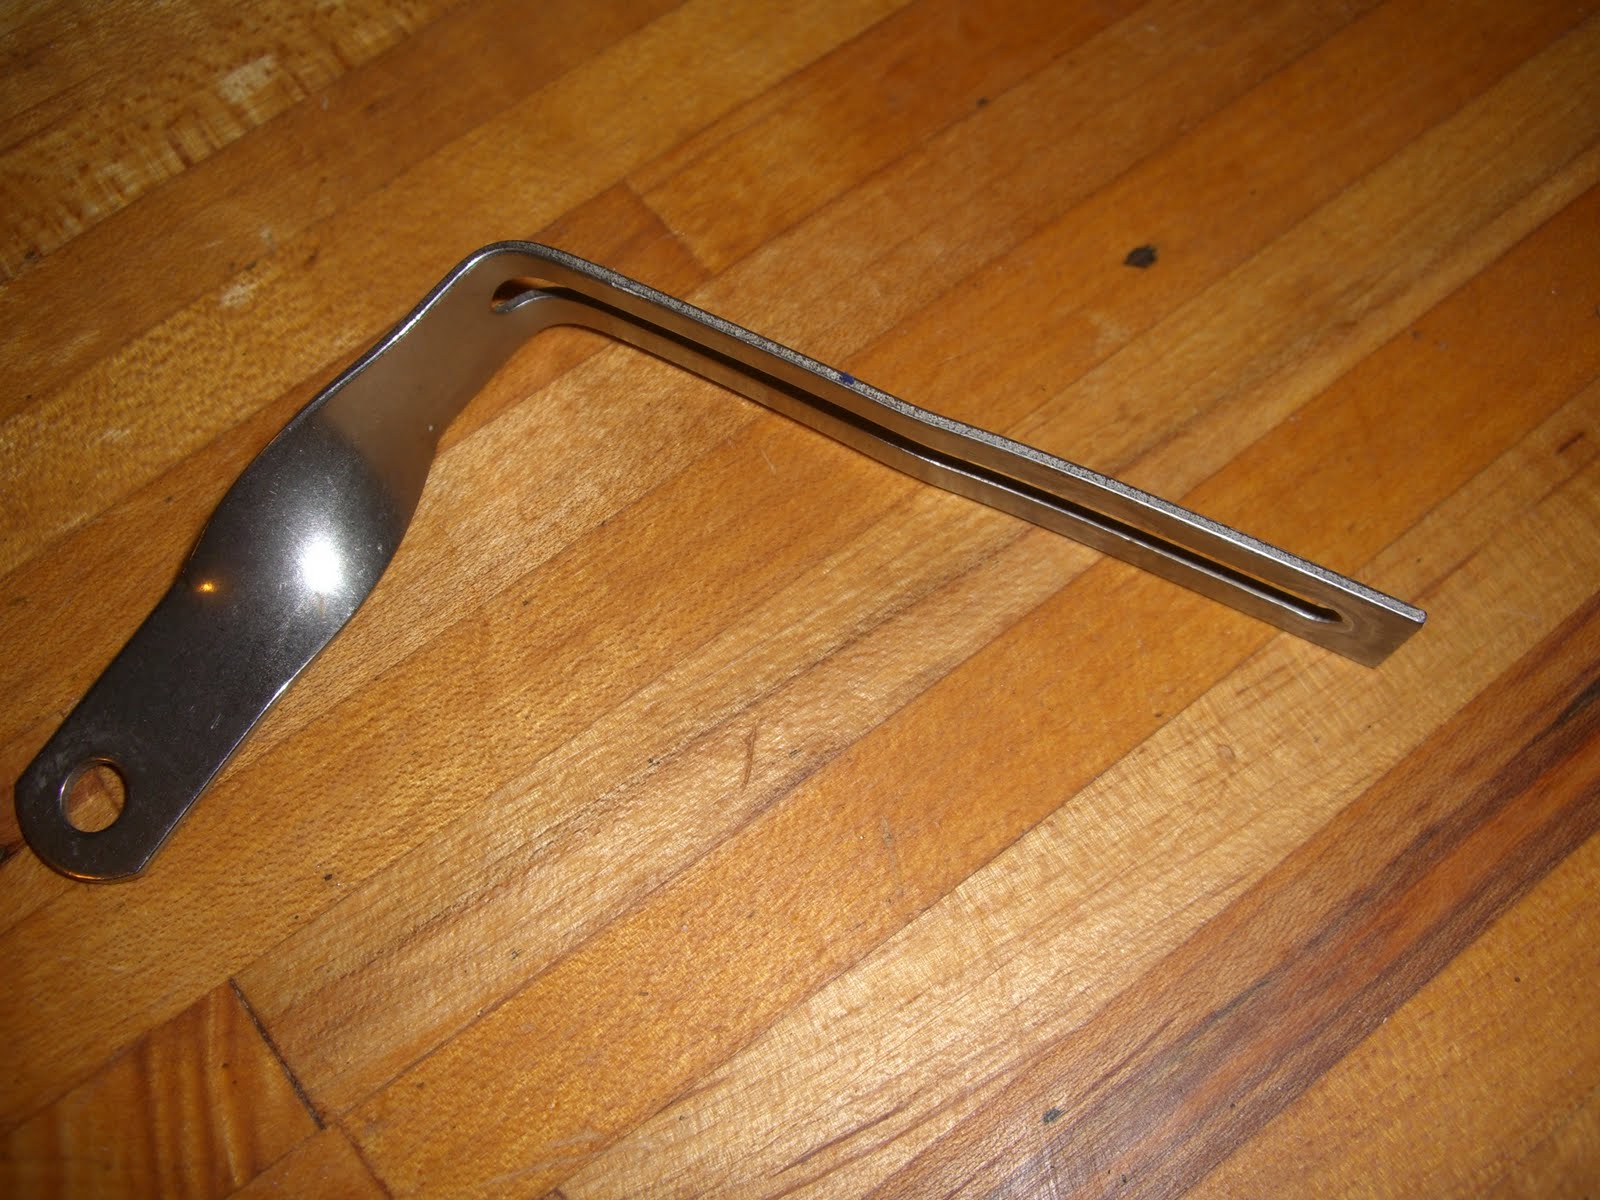
Well, it was for me. I know I said I wasn't going to mention it again, but file the burrs off the hole and then we have:
Now this needs a bend. I didn't take a picture of how I executed the bend, but later on there will be another picture of some homebrew bending rig:

Now we get out the hacksaw and cut again:

Note the cleanly filed edges. Oops, there I go again. Really, don't stint on the filing when doing this sort of thing, everyone will be a lot happier in the long run.
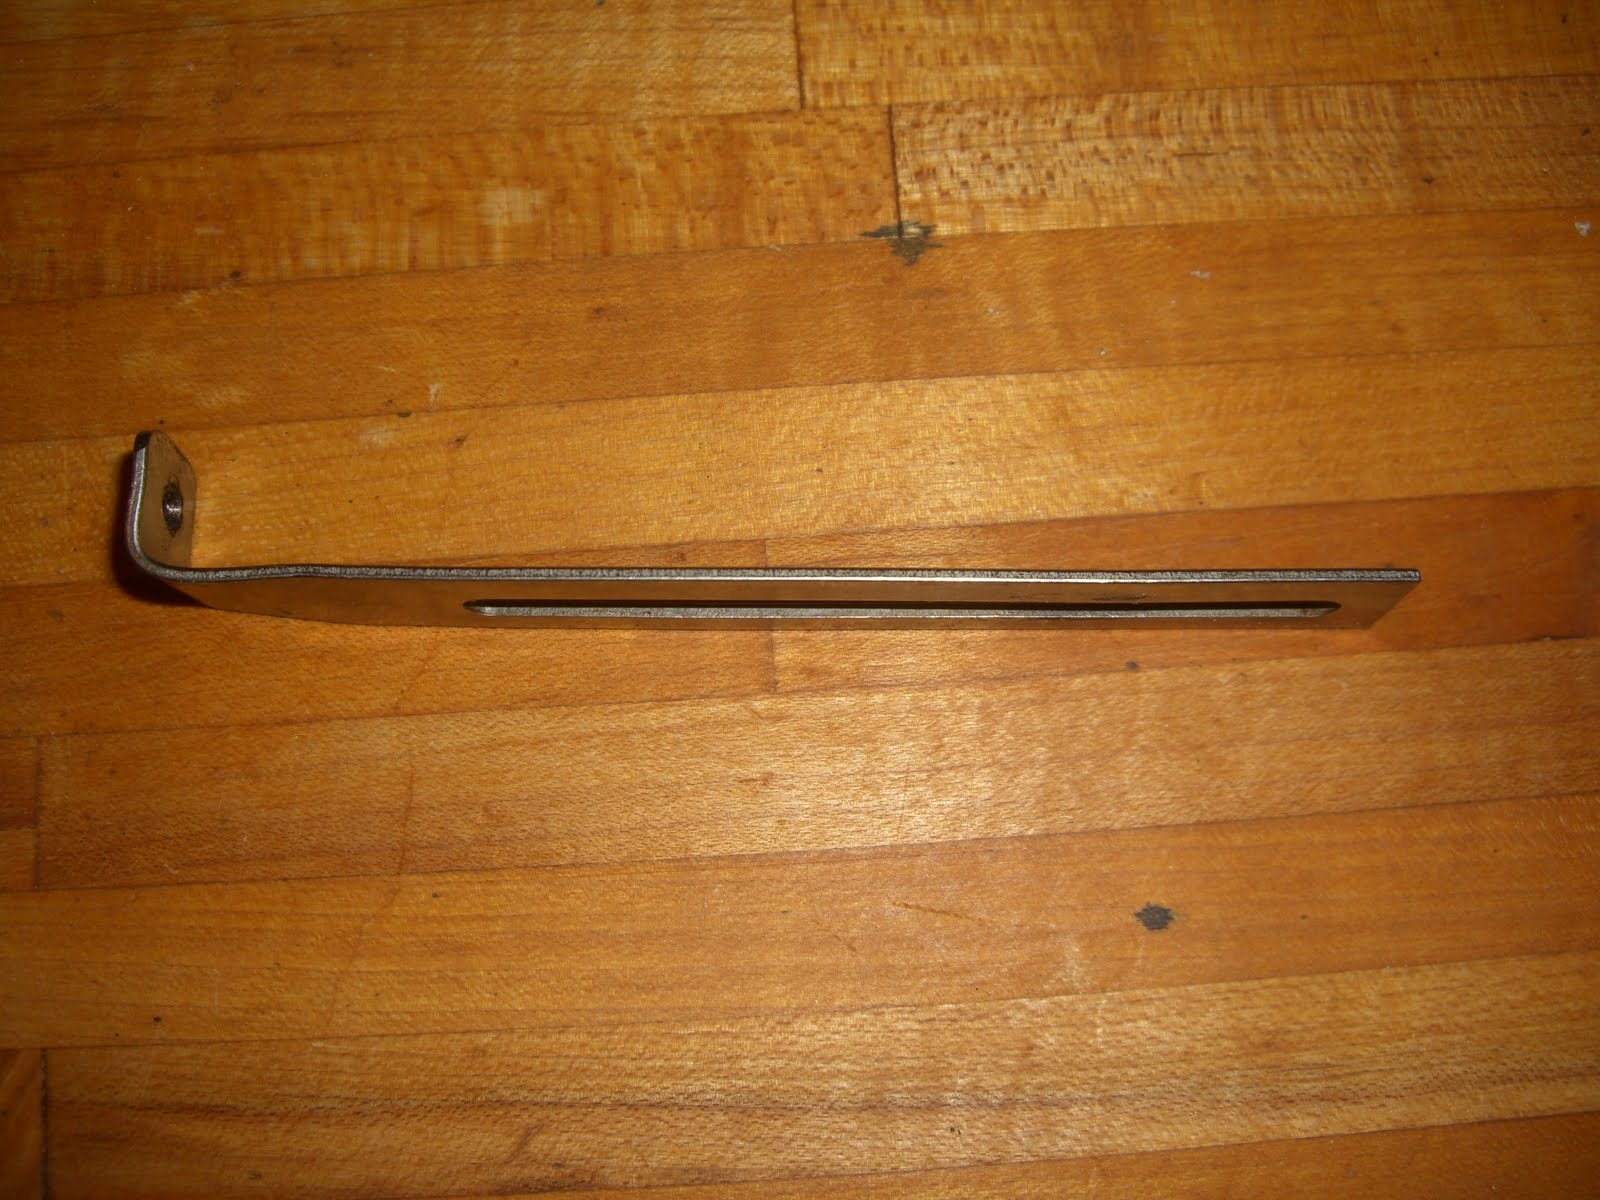
Now the flat piece needs a bend and we can see how to do this:
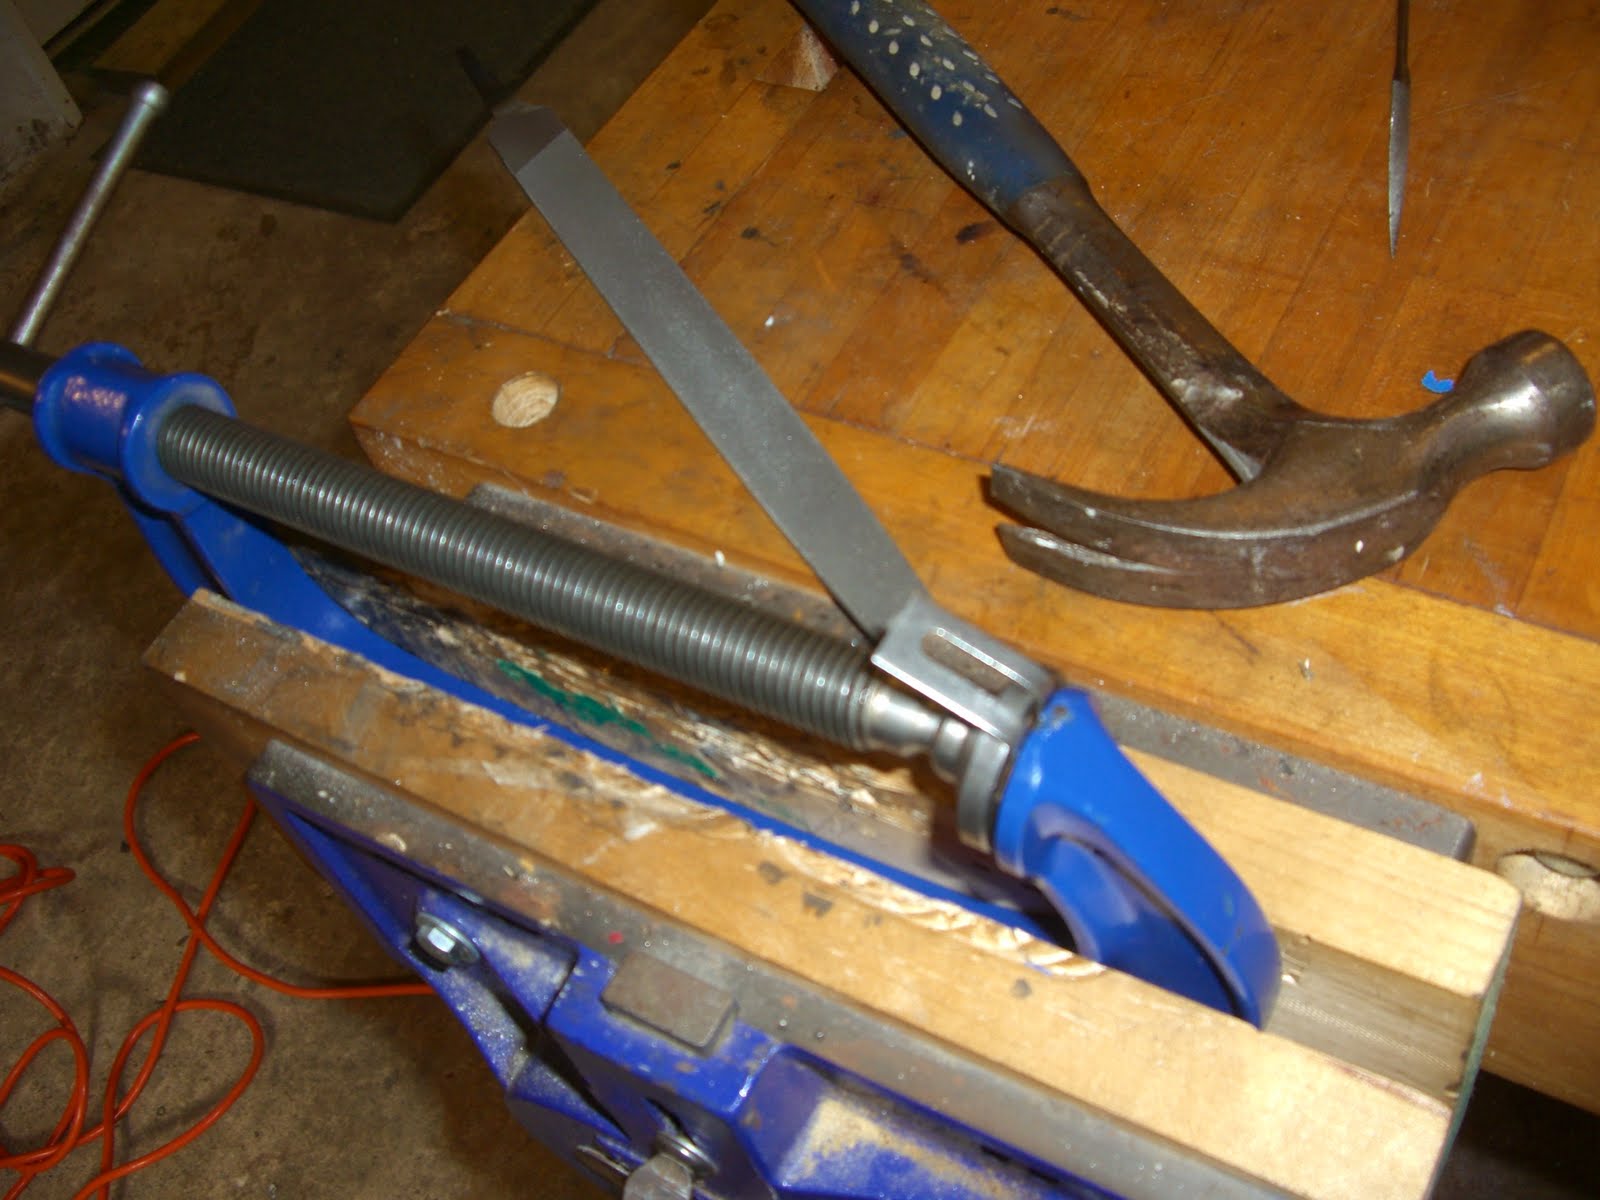
We secure the piece in a C clamp and use it as an anvil, beating it over with the hammer. Try to hit as close to the clamp as possible. Just in case anyone is wondering, this material was much too tough to bend with any accuracy by hand.
Note the ever vigilant file, ready at a moment's notice....
Now, at this point some readers may call foul because not everyone has a nice bench vise like shown above, but this wasn't strictly necessary, more of a convenience to end up now with two pieces as such:

I scrounge up some provisional hardware which will be augmented with washer and such in final assembly after I make a run to Hardware City and our creation begins taking final form:


Where this is heading should be pretty obvious at this point. Were we complacent, we could almost stop now. But since The Phoenix Project is emphasizing reliability and durability, we turn our attention to the bent strut:

Using a C clamp yet again, we press out the offensive bend:
We then cut the strut and prep the offcut:
So now we are ready for a first fit up to the fender:
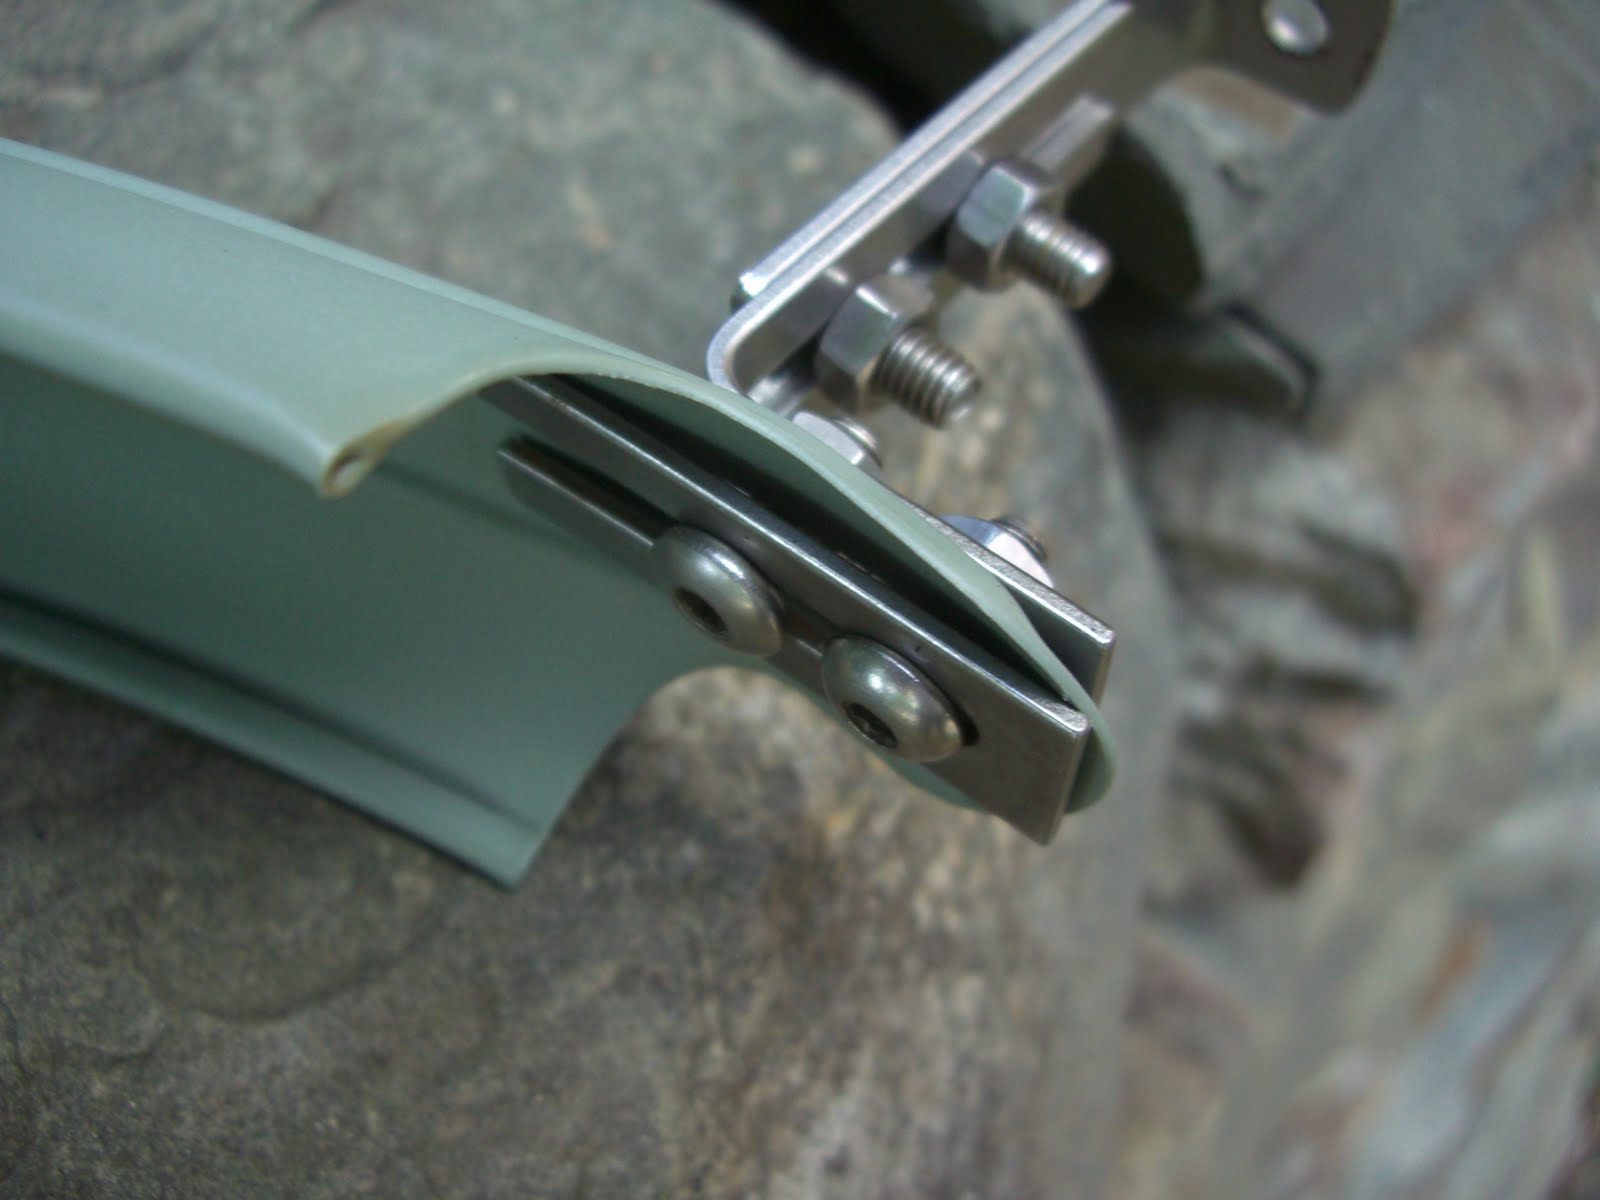
We can see that the offcut is for a backing plate. This is always a really good idea with metal fenders, especially aluminum ones although I'd do it the same for steel fenders.
We can see the the backing plate is flat and the aluminum is rounded. We can deal with this by wrenching down hard on the attachment bolts and flattening this area of the fender. We could also lay the backing plate on a wood surface and beat on it some with a hammer to induce a bit of roundness along its length. Or we could do both, which is probably what I'll do in final fitup.
Here is another shot:

The use of two bolts at this point and then on the mount extension prevents twisting. One would probably be fine for most purposes, but this is more secure. Plus, if there is some repair necessary elsewhere on the bike in the field, one of these bolts is temporarily scavengable.
Here is yet one more picture:
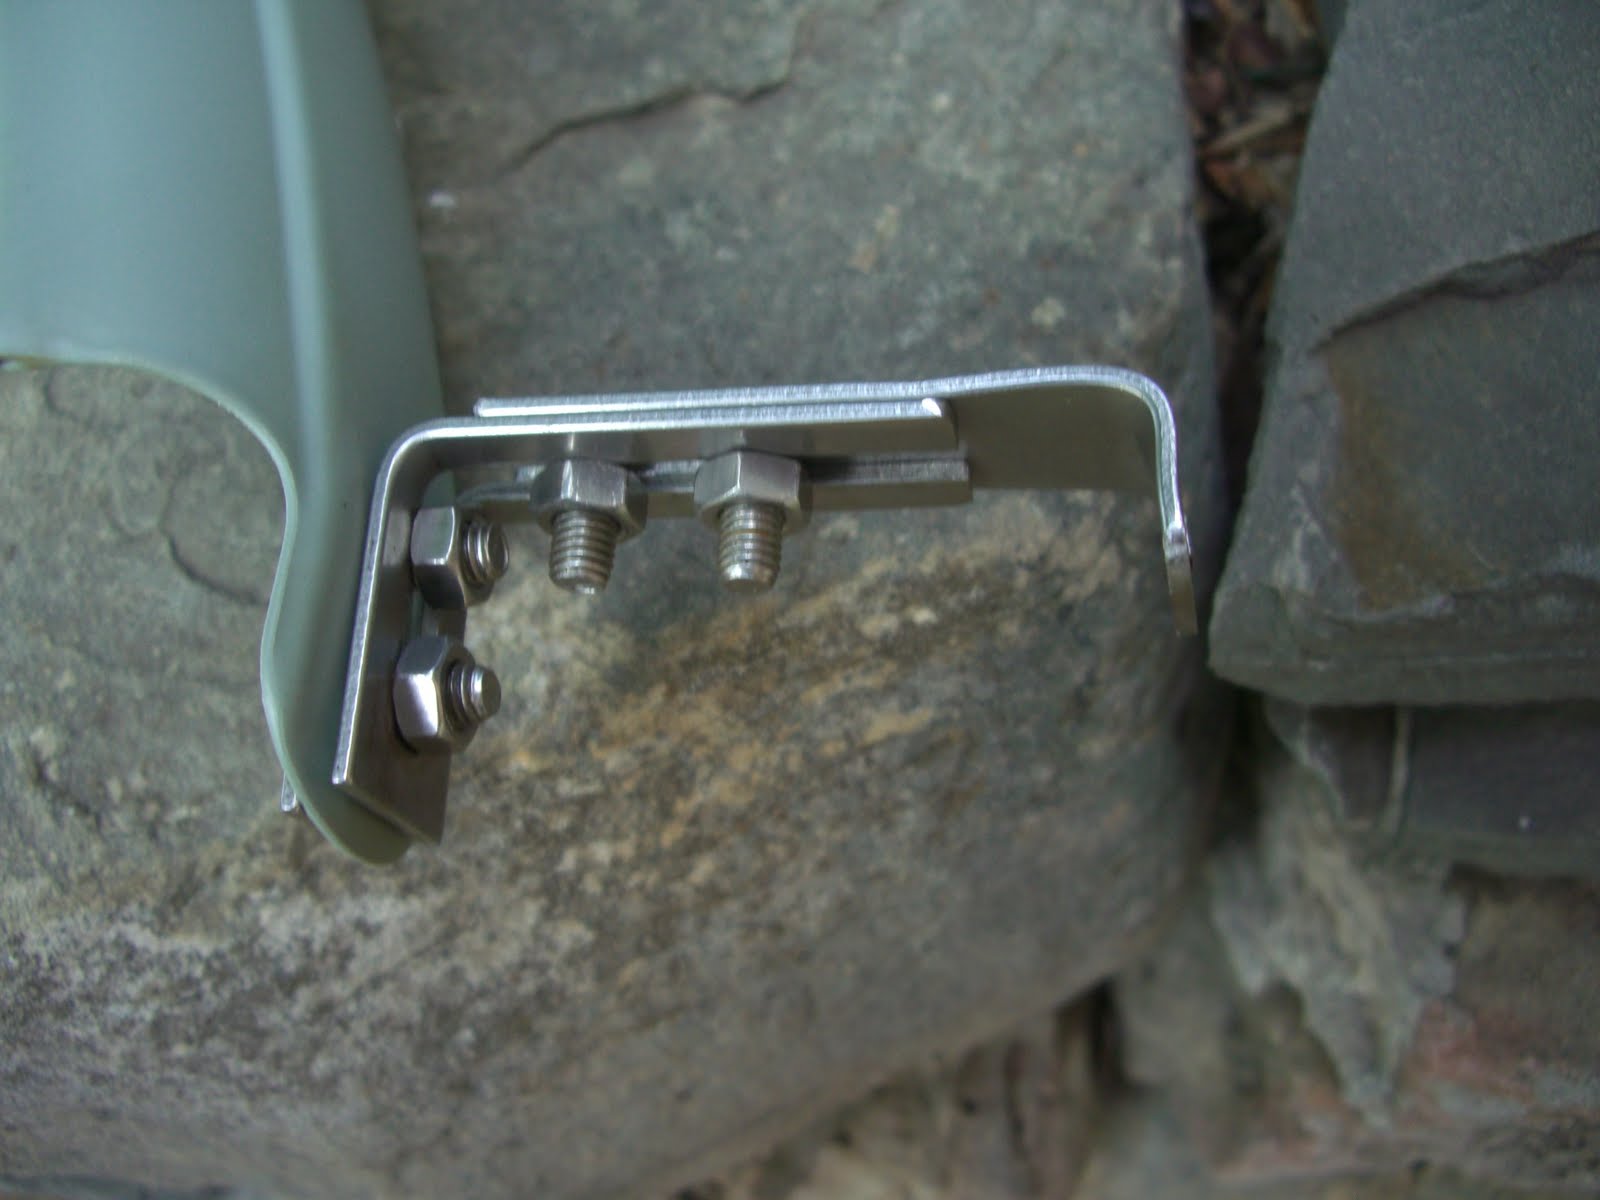
The bolts on the top will probably be replaced with shorter ones in the final assembly.
I'd like to take this moment as an opportunity to pontificate about allen head sockets. Specifically, 3mm allen heads on M5 bolts. People put these all over their bikes for fender attachments, water bottle mounts, and so forth because they look sleeker than the standard 4mm head.
Me, I avoid them because the 3mm socket faces are delicate and easily stripped on a stubborn bolt. In this case, I'll make an exception for the bolts on the inside of the fender because the 3mm bolt heads are lower profile and, being rounded, are less likely to snag debris inside the fender.
With fenders, inside clearance is everything.
But the other ones I'll replace after a run to Hardware City. I do this with all 3mm allen bolt heads whereever possible. It looks a little clunkier but really helps on ruggedizing a bike.
Finally, we take this fender to the Trek 620 and see how it works:
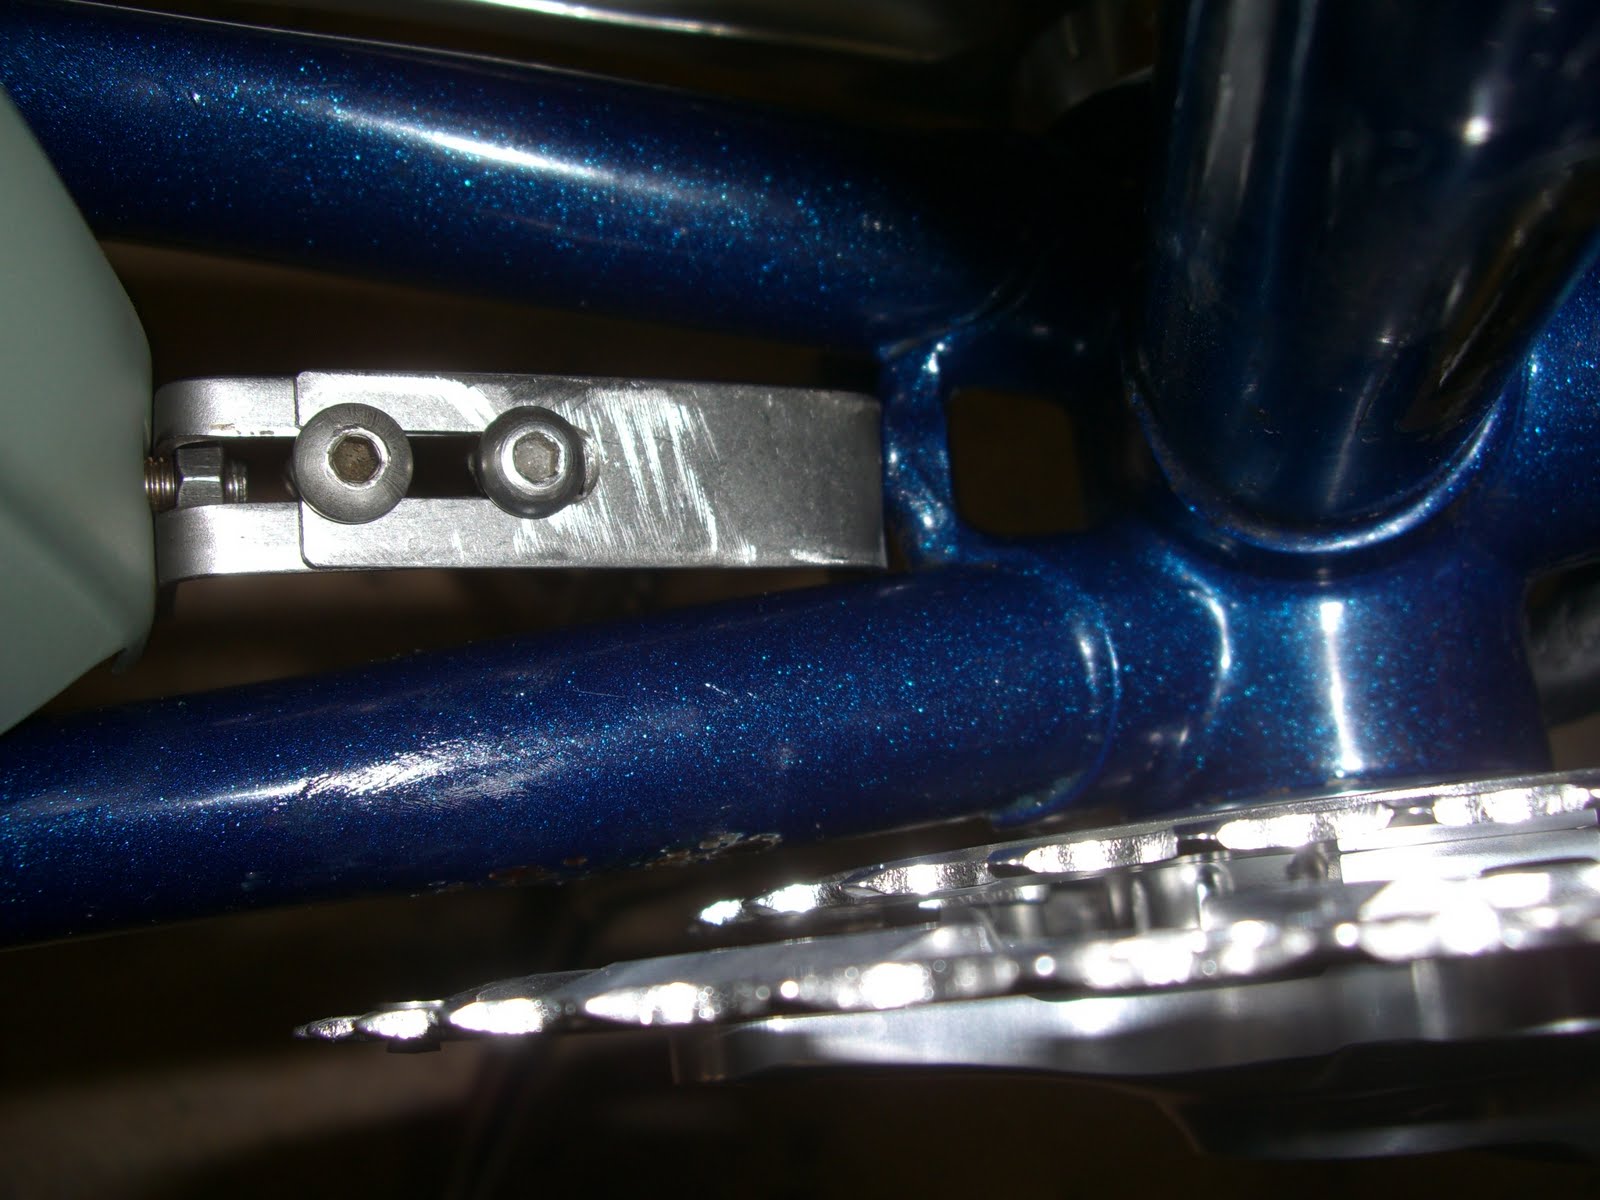
Perfect. The final installation will have a rubber/plastic washer between the bridge and the clamp for vibration dampening. Faucet washers are a cheap, readily available solution and are much more durable and markedly less foo foo than leather washers.
This isn't quite perfect, looking at my handiwork I may extend the top slot a bit. It does look like the top piece could have been cut a bit longer, but the fender is actually hard up against the wheel.
All in all, a nice little project. If anyone is wondering, it took a lot longer to write this post than to make the fender mount.
Since I had the fender on the bike:

No comments:
Post a Comment